
Products
Creating products as a Supplier using AlphaDiscouters is super easy. After Supplier registered on our marketplace, they can easily create products and customize them from an intuitive dashboard.
So check out the documentation to know the process of creating products:-
Create a product from the Supplier dashboard
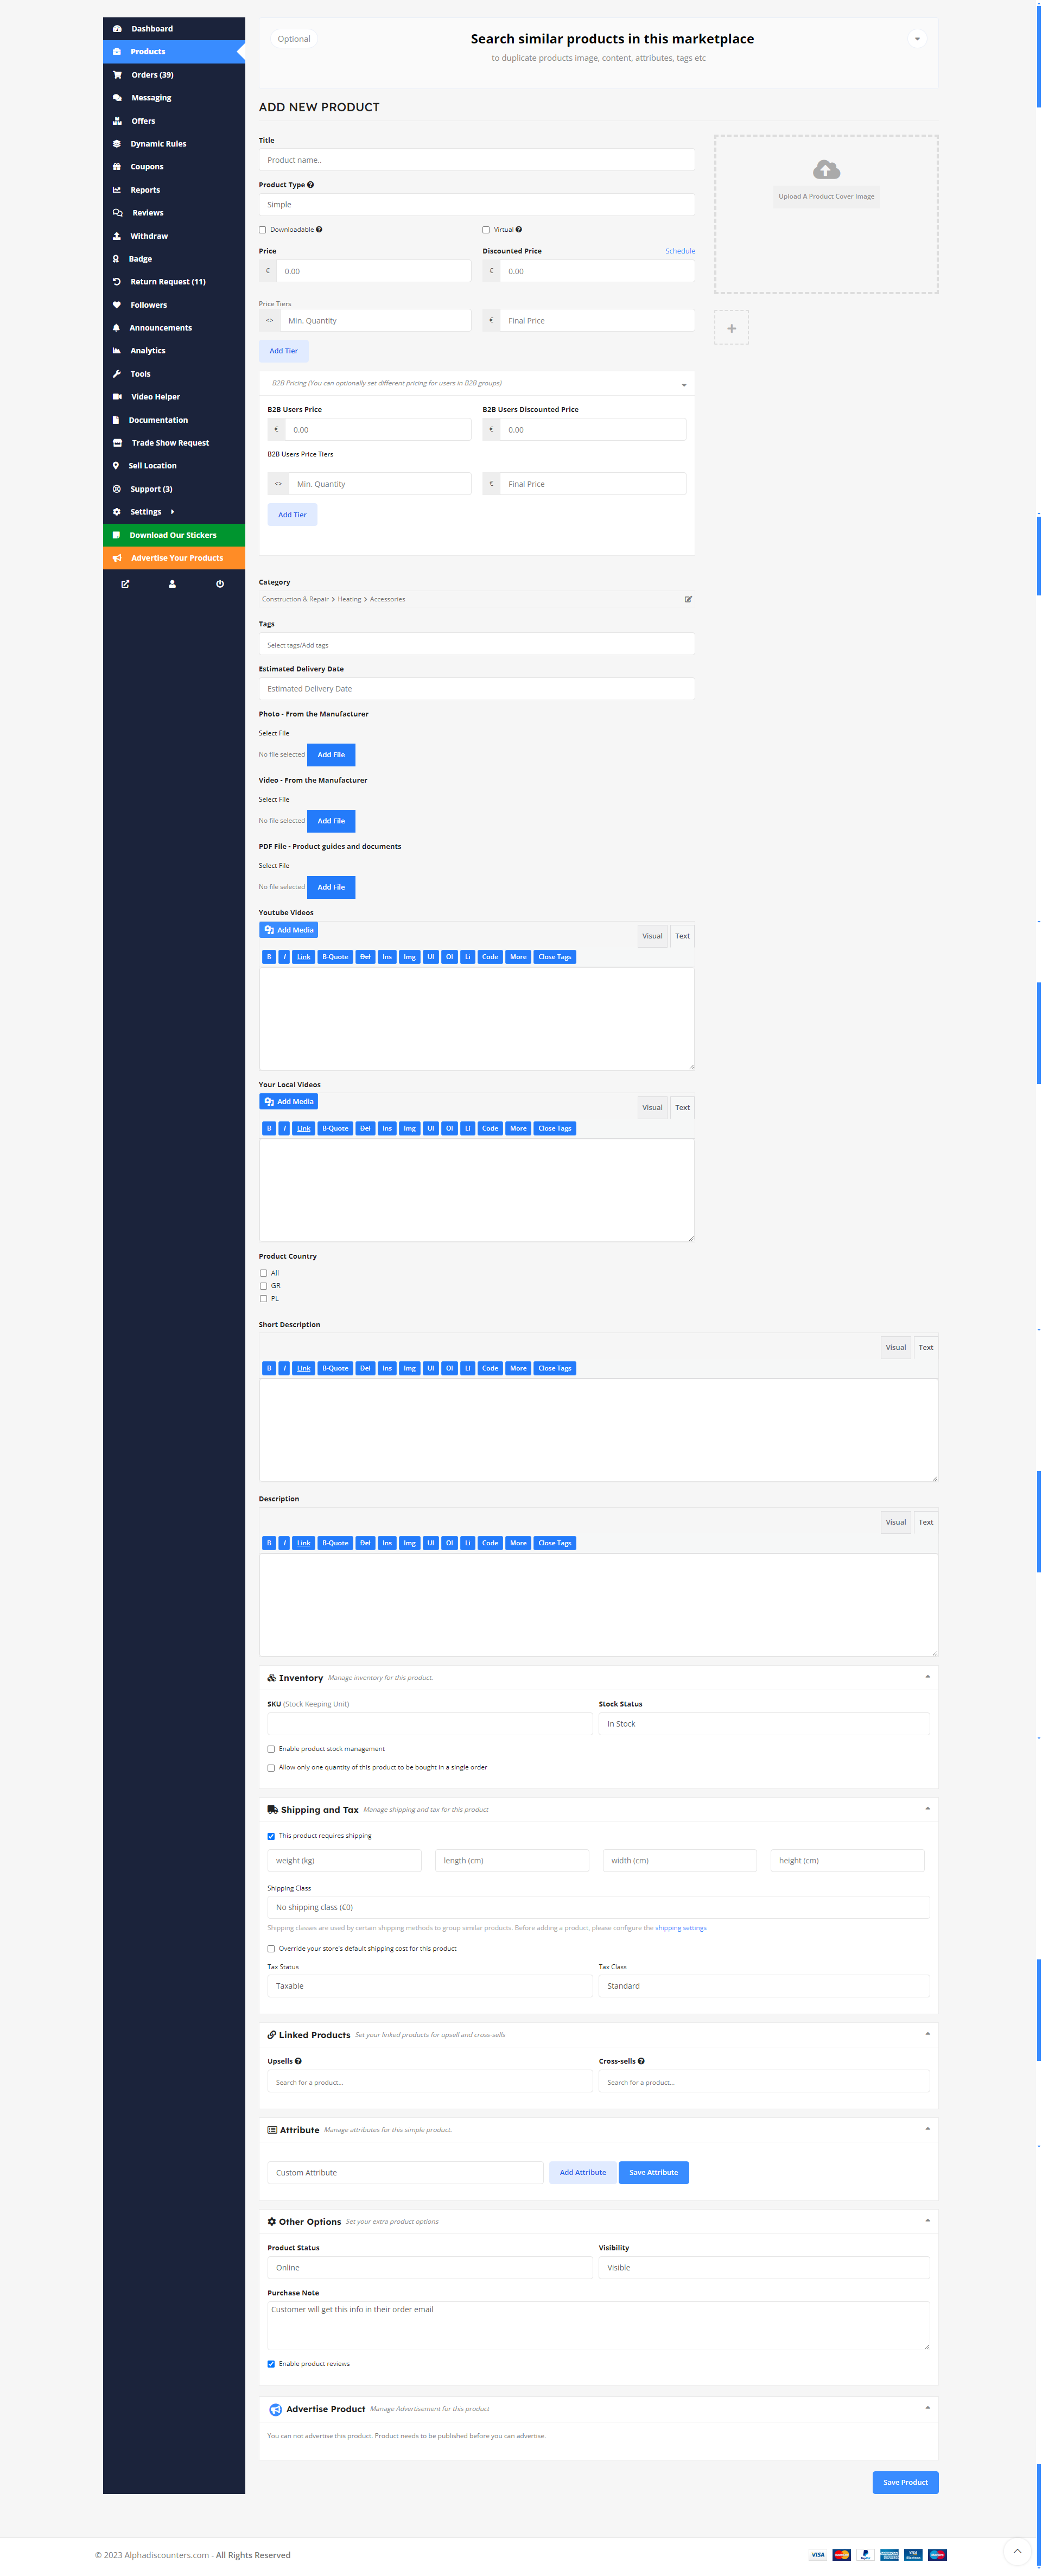
To create a product, navigate to the Supplier dashboard. And then click on Products from the left menu. After that click on the Add New Products button from the top right corner.
You’ll get a new window where you will be able to create a new product giving all the details only.
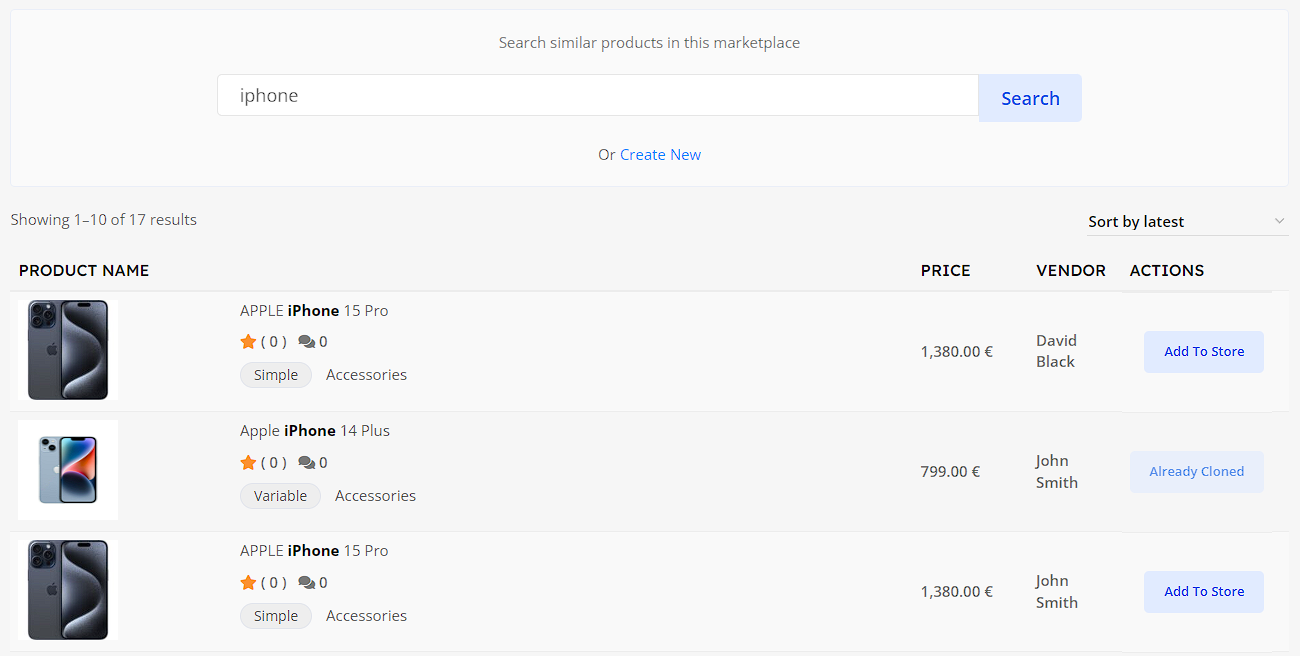
Add an existing product
Search Similar Products – This feature allows vendors to easily list and sell existing products from other vendors with a Sell This Item button on the product page, fostering price competition and attracting more customers. It enables quick, one-click product additions and offers customization options even after importing the product, ensuring a varied and competitive marketplace.
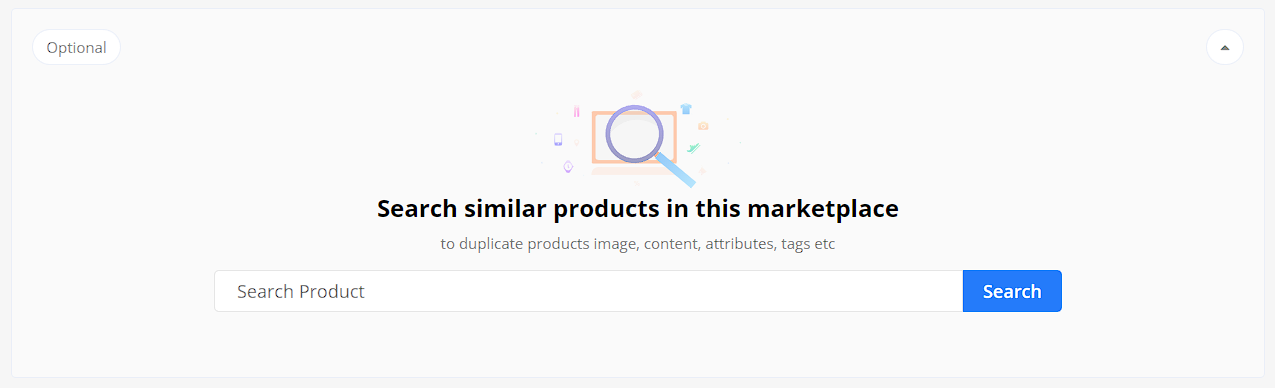
After entering the required name and clicking the “Search” button, the products will be displayed, and you will be able to add them to your store with a single click.
Basic Details
General information about the product – title, price, description.
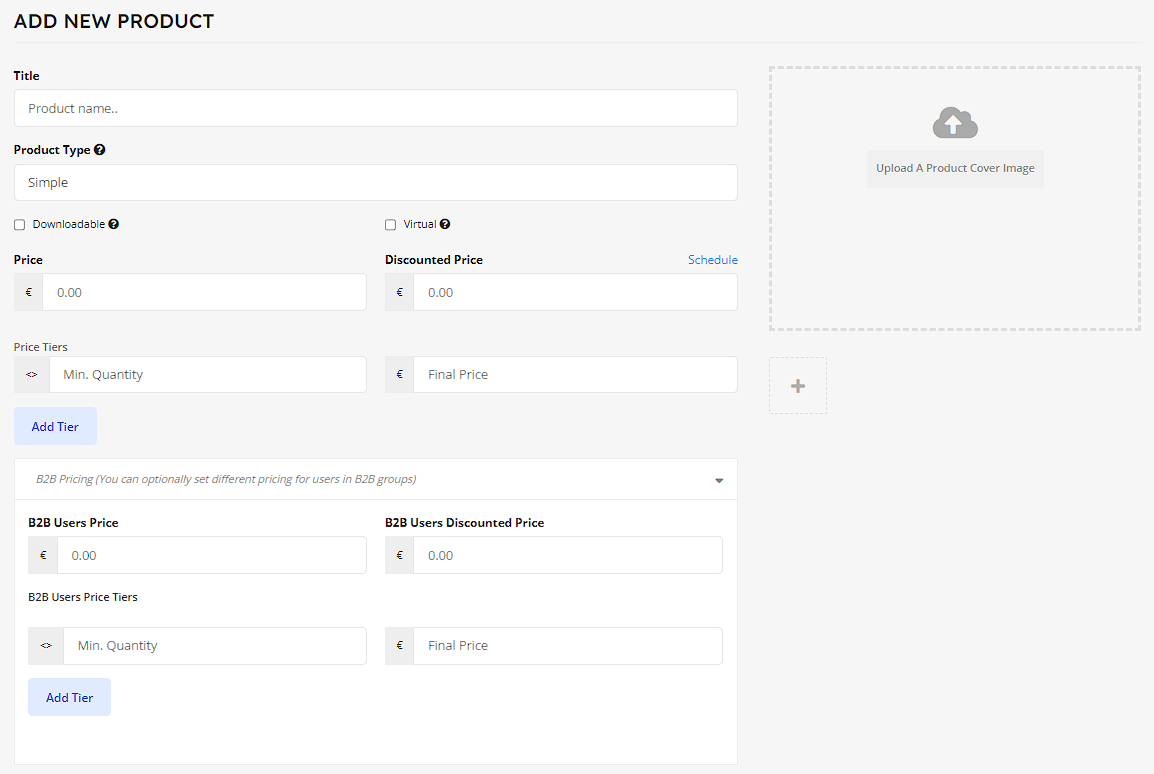
Title, Type, Price, Image
1. Title – the name of the product that customers will see in your store.
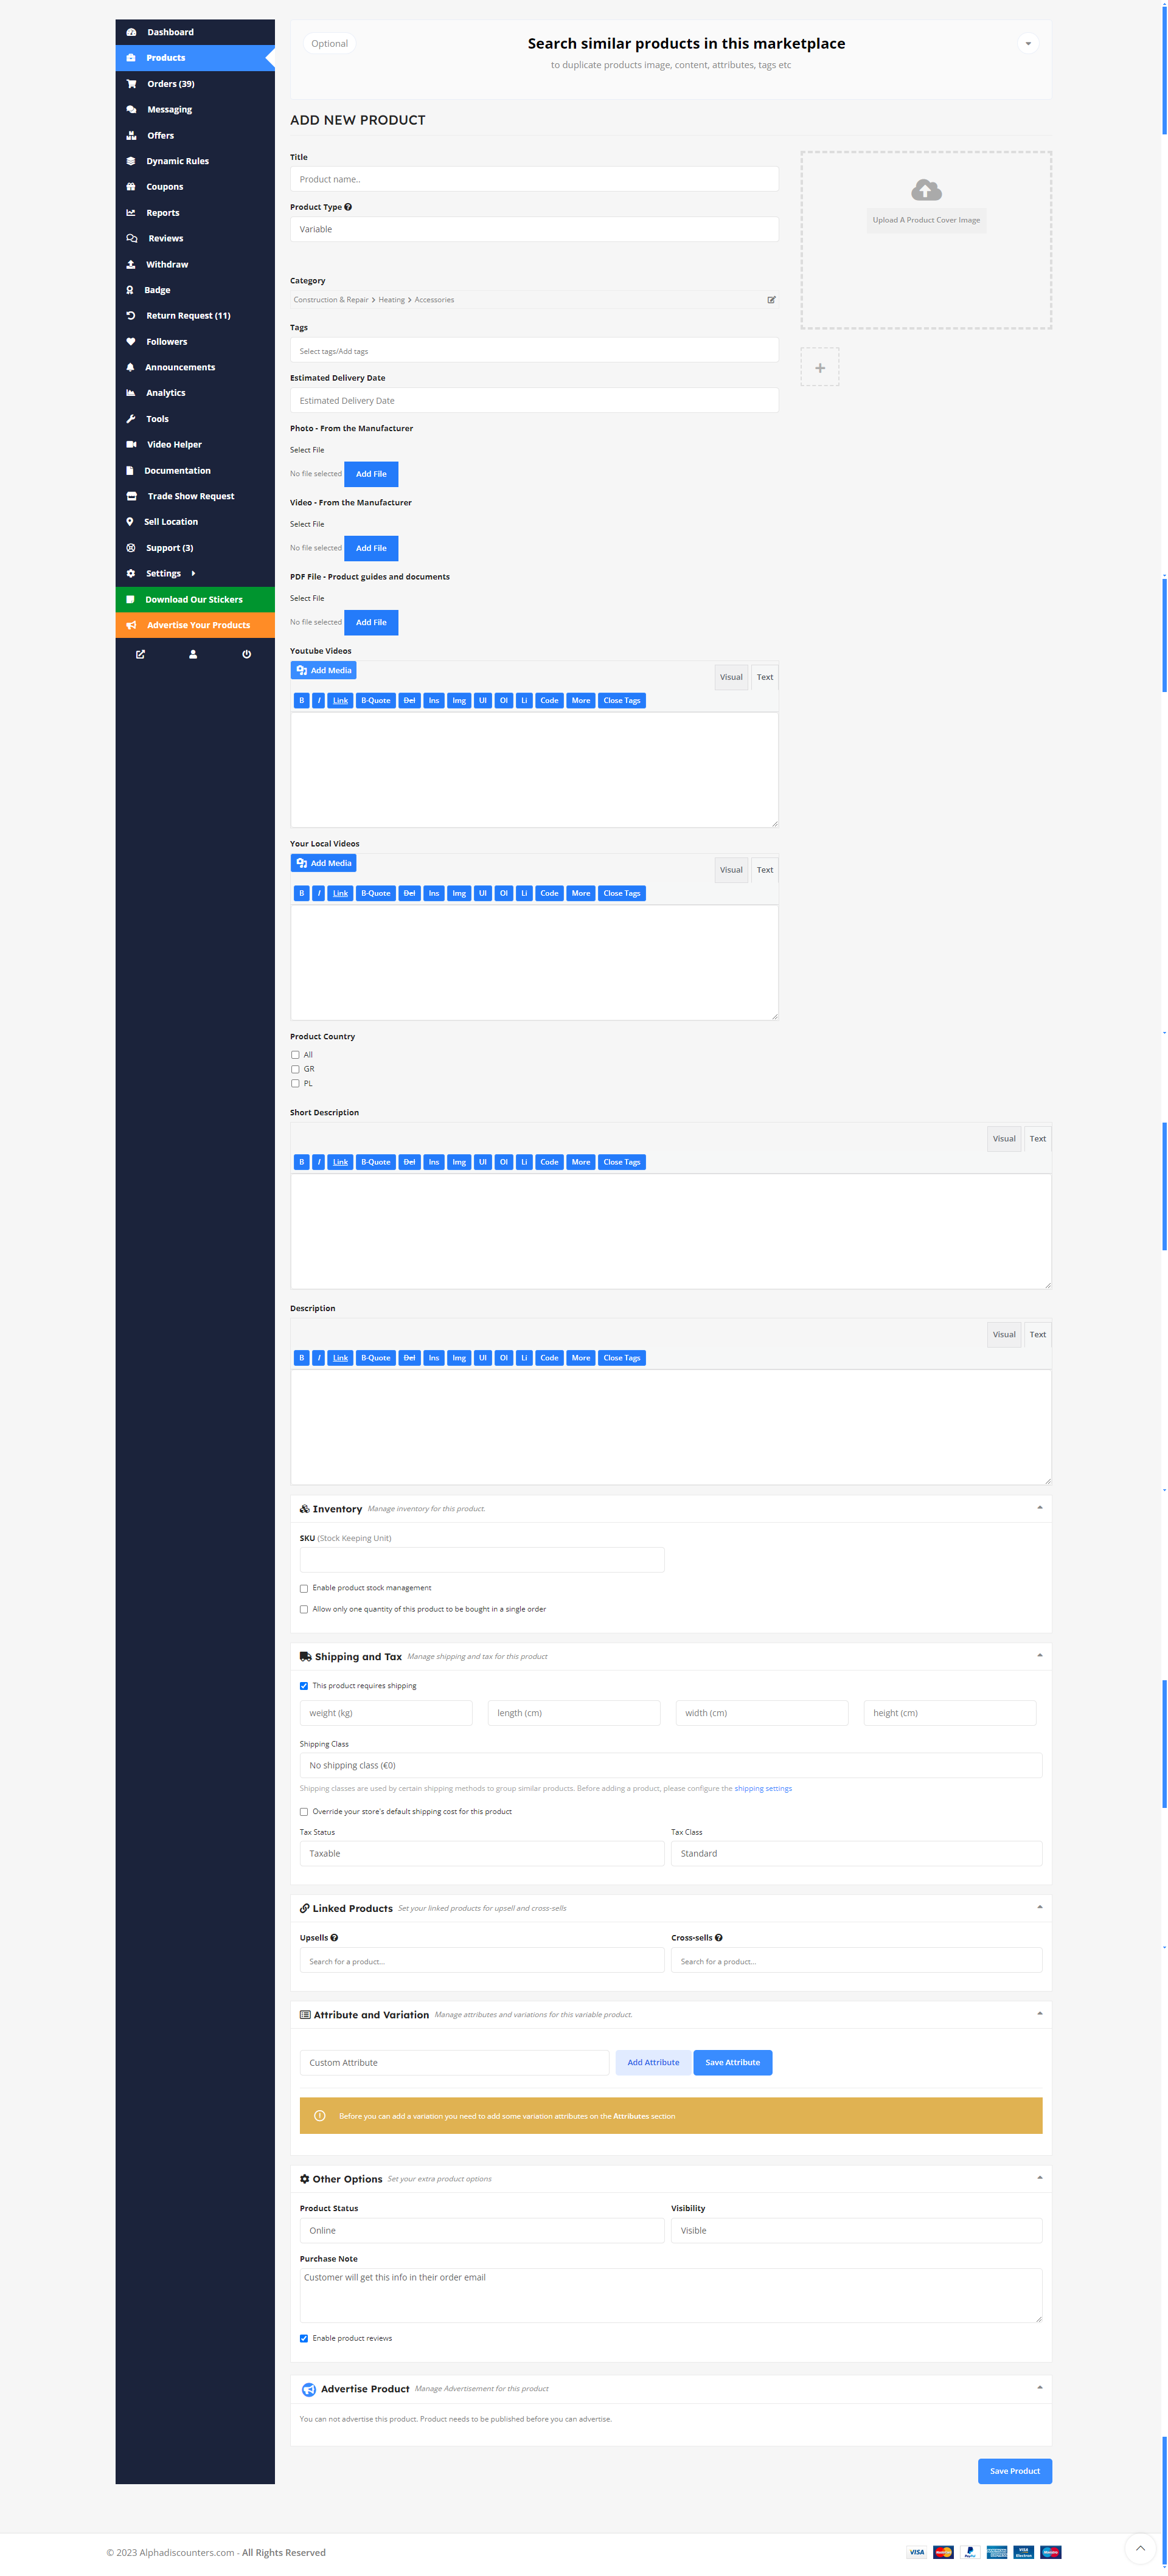
2. Product Type – the classification of a product that defines its characteristics and how it behaves in your store, such as Simple, Variable or Grouped (more details about each type are written below).
3. Price – the standard cost of the product that customers will pay before any discounts are applied.
4. Discounted Price – an optional lower price for the product that can be set for a promotional period or a sale. If set, this price will be displayed to customers instead of the regular price during the discount period.
The discounted price is optional. The supplier can schedule significant discounts for a specific period in the second discount field and enter the start date and end date to automatically apply the discounts to your products.
5. Price Tiers – different pricing levels for a product based on the quantity purchased, offering customers volume discounts. For example, a lower price per unit is applied when buying in bulk or larger quantities.
6. B2B Price Tiers – special pricing levels tailored for business-to-business customers, offering bulk discounts or negotiated rates based on the purchase volume or agreement terms. These prices are typically more competitive and cater to businesses buying larger quantities or fulfilling specific contract requirements.
7. Product Image – the primary visual representation of the product that appears on the product page and in listings. This image helps customers get a clear view of what they are purchasing and should be high-quality, accurately showing the product.
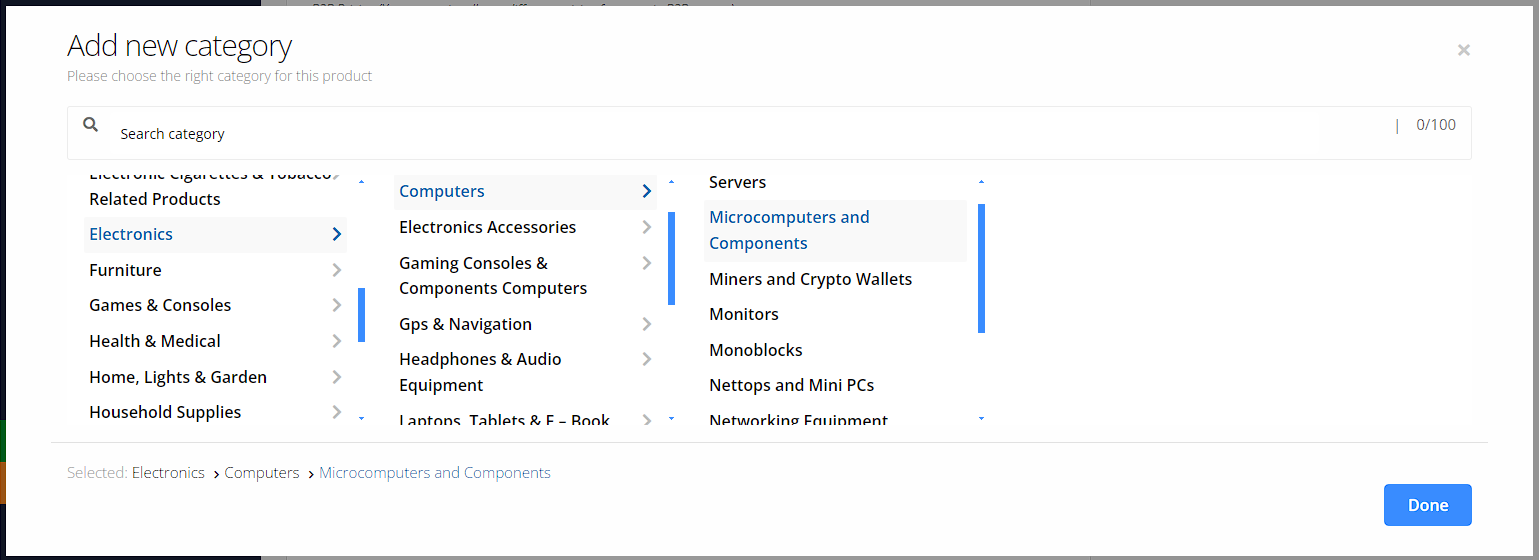
Select Category
By default, category selection is singular. That is why there is a drop-down field to select a category. This should be the standard-setting. Because according to Google Webmaster Guidelines and other SEO and UX best practices, it is recommended to have only one category assigned to a product. If you need to show your products based on multiple factors or for searching or sorting feature, you can use tags.
Categories must be created by the administrator. The supplier can only select them from the control panel. Allowing the supplier to create categories and tags might result in duplication.
Additional Product Info
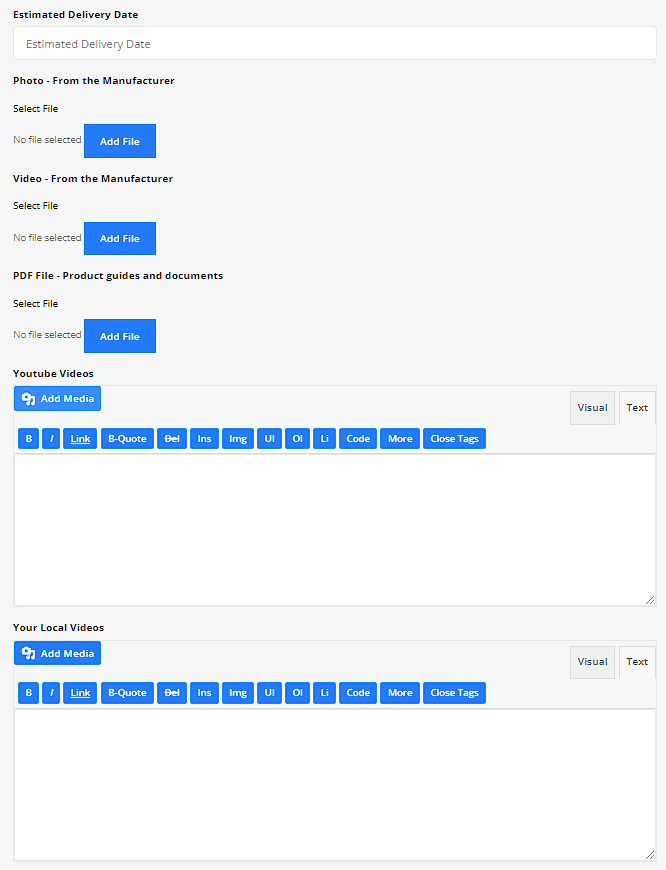
1. Estimated Delivery Date (optional) – approximate number of days for delivery.
2. Photo – From the Manufacturer (optional) – product image in a separate section on the product page.
3. Video – From the Manufacturer (optional) – product video in a separate section on the product page.
4. PDF File – Product guides and documents (optional) – product documentation in a separate section on the product page.
5. Youtube Videos (optional) – YouTube videos of your product displayed in a separate section on the product page. To add videos, follow these steps:
Add Media → Insert From URL, paste the video link and click Insert Into Post.
To add multiple videos, place each link on a new line and repeat the process. Here’s how this field should approximately look:

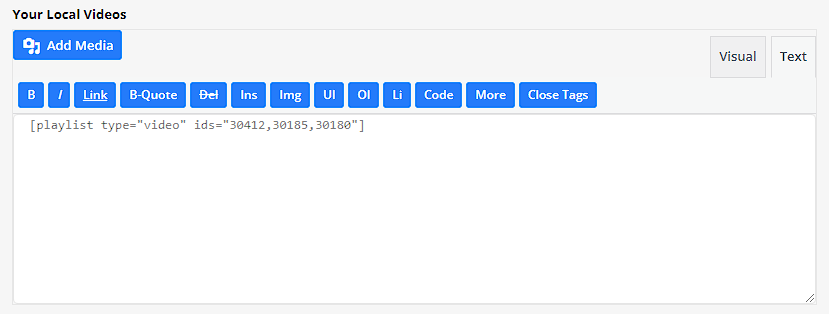
6. Your Local Videos (optional) – videos of your product from your local device displayed in a separate section on the product page. To add videos, follow these steps:
Add Media → Create Video Playlist → upload the desired videos and click Create A New Video Playlist → write a title for each video (these titles will be visible to customers) → click Insert Video Playlist.
Here’s how this field should approximately look:
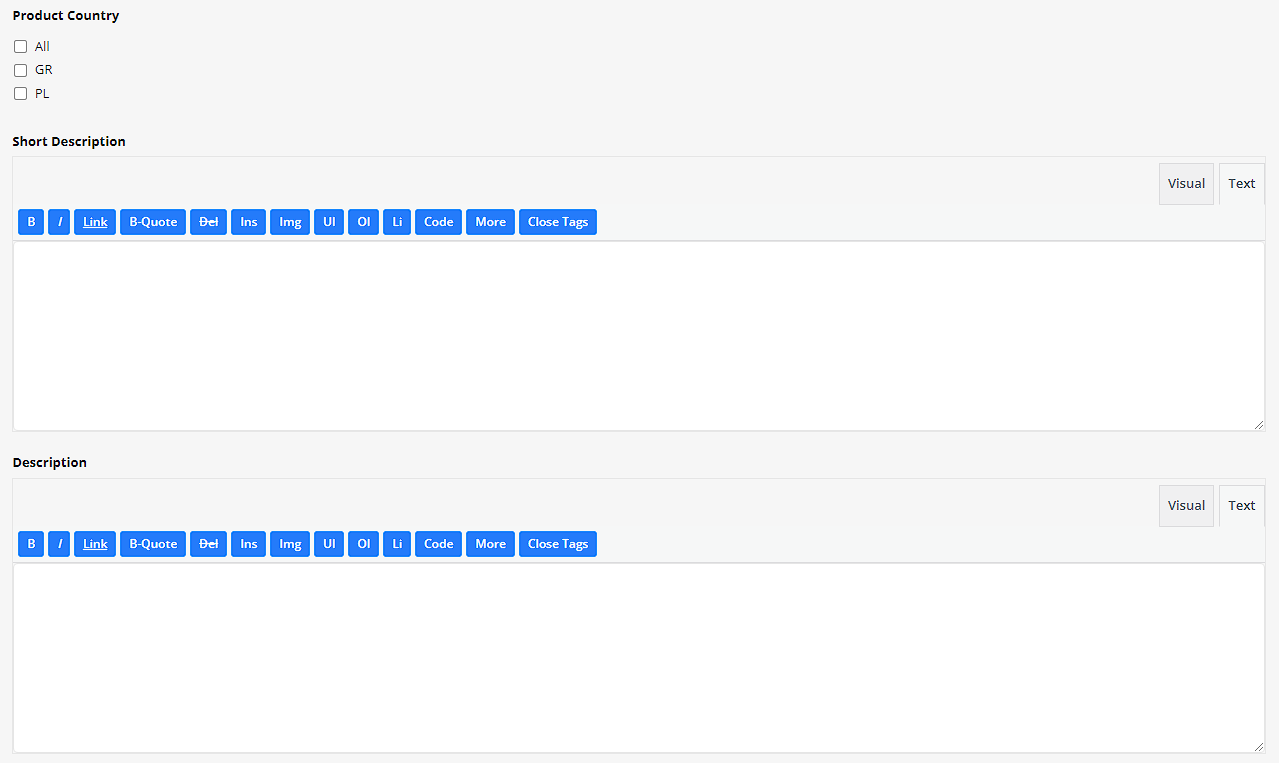
7. Product Country – countries where this product will be available (All means the product is available in any of the countries listed below).
8. Short Description – a brief summary or selling point of the product that appears alongside its title in listings and search results. It provides a concise overview to entice customers to click for more details.
9. Description – a detailed explanation or narrative about the product, typically including features, benefits, and other relevant information. It serves to inform customers comprehensively about the product and its qualities to aid in their purchasing decision.
All fields to customize additional product information:
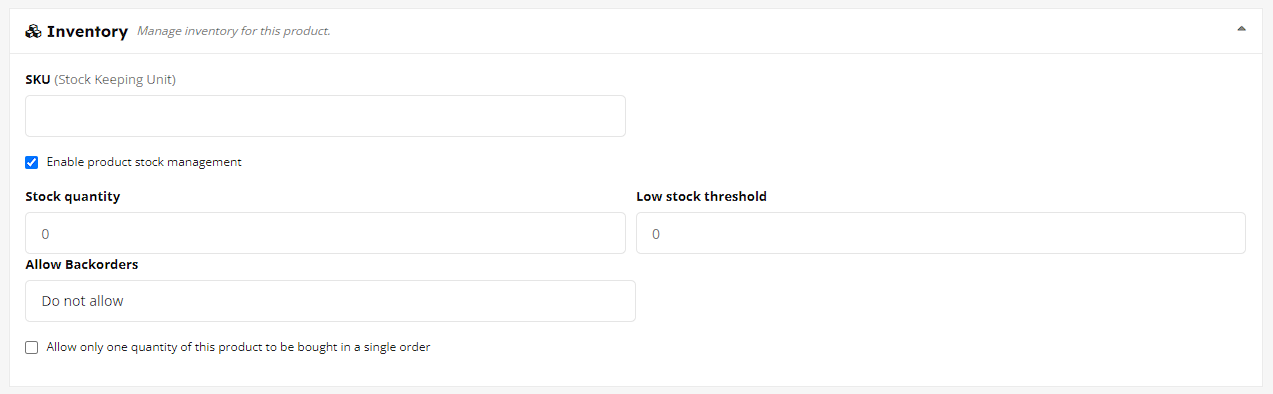
Inventory
1. SKU stands for Stock Keeping Unit. It should be a unique set of characters which will not match to any other product.
2. Enable product stock management: let’s say you have 10 pieces of the product and you don’t want to receive after orders are placed for 10 units. If you enable stock management and enter 10 in the quantity field, then after 10 units are ordered, this product will show a message that all the quantities are sold and there is no stock.
But, you might want to take some pre-orders before your next batch comes up. So you can Allow Back Order to let the customers place orders even if the product is out of stock.
3. Allow only one quantity of this product to be bought in a single order – it’s clear from the name.
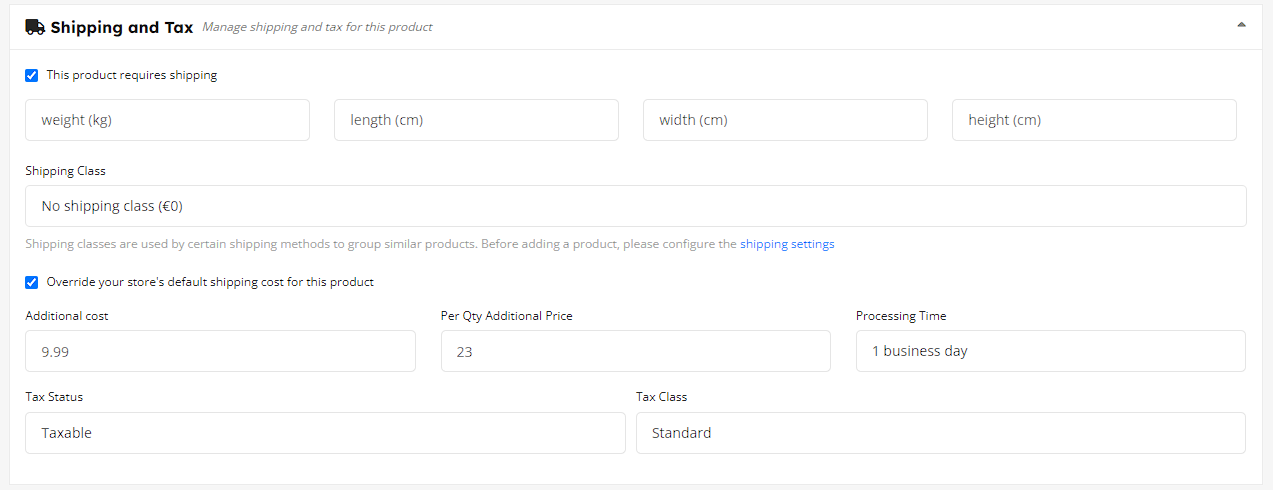
Shipping and Tax (only for physical products)
Shipping
1. This product requires shipping: Indicates whether the product needs physical shipping to customers.
2. Weight (kg): Specifies the weight of the product.
3. Length (cm), Width (cm), Height (cm): Dimensions of the product package.
4. Shipping Class: Groups products with similar shipping requirements for specific shipping methods. Useful for configuring shipping rates (more about using classes: here)
5. Override your store’s default shipping cost for this product:
– Additional Cost: Extra charge added to the base shipping cost for this product.
Per Qty Additional Price: Additional charge per quantity of the product for shipping.
6. Processing Time: Specifies how long it takes to process the order before shipping, typically in business days.
7. Tax Management:
– Tax Status: Determines if the product is taxable or tax-exempt.
– Tax Class: Assigns the appropriate tax rate or exemption category for the product.
Linked Products
Linked Products refer to the association of one product with others in your store, creating a relationship that can encourage additional sales or provide complementary options for customers. There are several types of linked products:
1. Upsells: Products that are suggested to customers as alternatives to the current product, typically higher-end or more profitable options.
2. Cross-sells: Products that are recommended to customers at the cart or checkout stage, offering related or complementary items that may enhance their purchase.
3. Grouped Products: Collections of related products sold together as a single unit, allowing customers to purchase them as a bundle rather than individually (available only if the product type is group).

Attribute
Attribute – a characteristic or feature of a product that provides additional information or choices for customers. Below are instructions on how to add attributes:
In the attribute list, you can choose either a Custom Attribute (you need to completely create the product feature yourself) or select an attribute from the predefined ones we offer.
1. Custom Attribute: You need to select Custom Attribute and click the Add Attribute button. Then, you must specify the attribute name and its value, and then click the Save Attribute button.
2. Predefined Attributes: You need to specify a predefined attribute (for example, color) and click the Add Attribute button. Then, you need to choose the attribute value from the predefined values or create a new value by clicking the Add New button. After completing these steps, you must click the Save Attribute button.
Visible on the product page means that this attribute will be displayed in the attribute table on the product page.
You can create multiple attributes for one product and combine custom attributes with predefined ones.

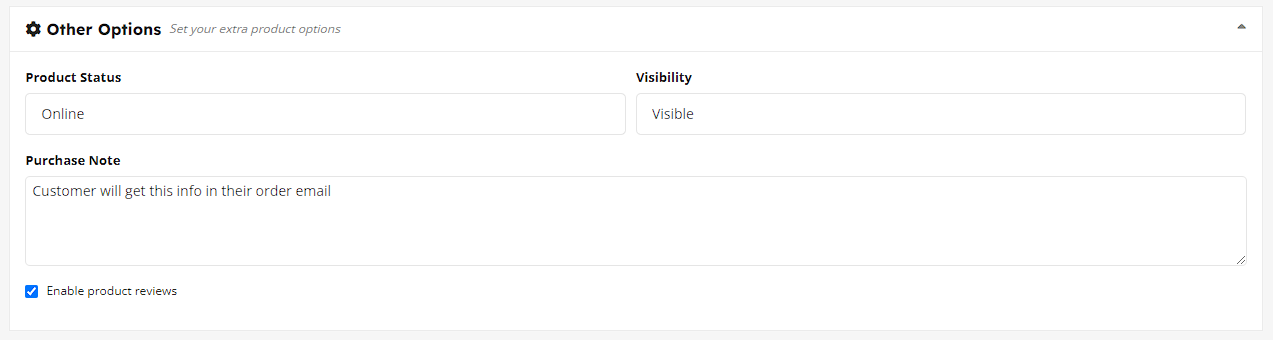
Other Options
1. Product Status – Indicates the current state of the product in your store. The typical status is Online, which means the product is active and available for purchase. If set to Draft, the product is not yet available to customers until you publish it.
2. Visibility – Determines how and where the product appears within your store and search results:
– Visible: The product is fully accessible and appears in all relevant listings, search results, and store pages.
– Hidden: The product does not appear in the store catalog or search results but can still be accessed directly via its URL.
3. Purchase Note – A custom message that will be sent to customers in their order confirmation email. This note can contain special instructions, thank you messages, or any important information related to the product or order.
4. Enable Product Reviews – Allows customers to leave reviews and ratings for the product. Enabling reviews can help build trust and provide feedback for other potential customers, contributing to a more engaging and informative shopping experience.
Advertise Product
You can order advertising for your products. The ads will be displayed in the sidebar of our website on informational pages. To advertise products in other sections of our website, please visit the advertising page.

Selecting Product Type – Simple Product
These types of products are simple and have no variants. They are single and standalone products, which does not require any other information to define different variants.
Selecting Product Type – Variable Product
A variable product is a product that has different types of variants. For example, you might want to sell a dress which is available in 3 different colors and sizes. So this option will enable you to add those colors and sizes you need. You can add variations based on anything you like, perhaps material used or the stitching style.
Check this video on how to create a variable product →
Quantity and variation picture adding function will not be available right away. You have to save the product once to get those options. Right after saving the product, the fields above will have a pencil icon on the right. Click on that to add more details to the variations.
Selecting Product Type – Grouped Product
To learn about the grouped product go through this tutorial.
Downloadable Product
Downloadable – This setting is used for products that are delivered digitally. When a product is marked as downloadable, it allows customers to download files directly from your store after purchase.
Virtual – This setting is used for products that don’t require shipping. Virtual products are typically services or intangible items that don’t need physical delivery.
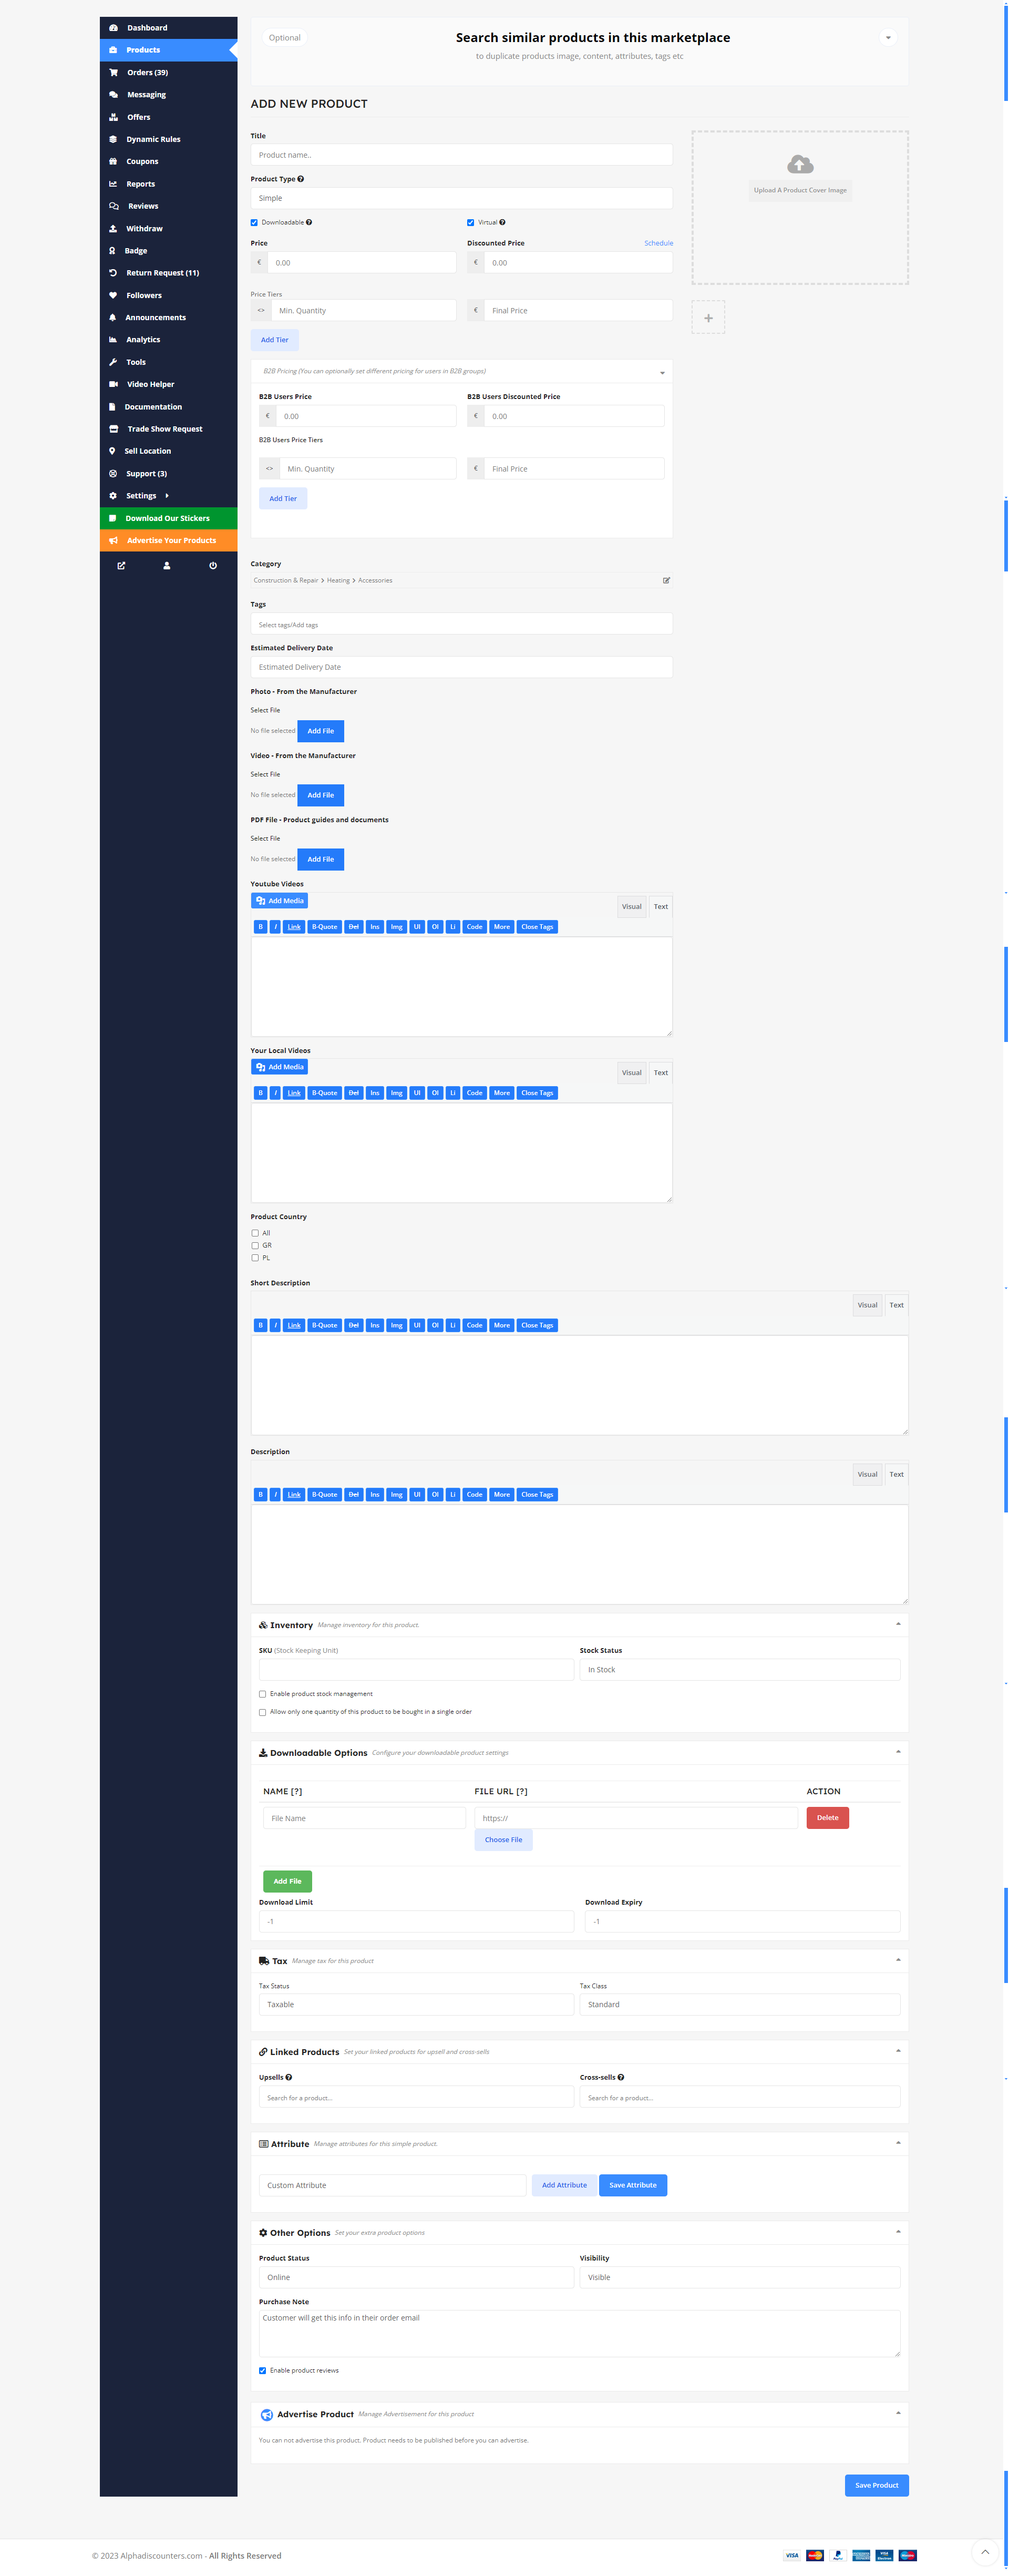
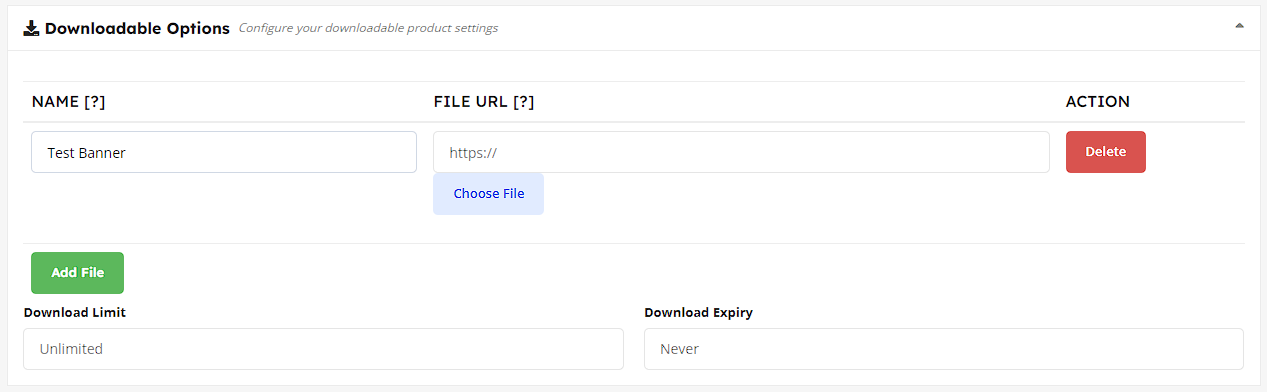
If you are selling photos, music, software or any digital product, then this is the option to use. If you click on the Add File button, three more fields will be added.
The name field defines what the downloaded file name should be. We are letting you define that because you might name the original file to something like “new-album-updated-jan-12.zip” and you want the user to download the file as “New Album”. So this option will be useful for you to serve and organize better.
If you are serving the files from your very own site, then you can click on choose file and select. But you can also serve the file from Dropbox, Google Drive or some other file hosting site you like.
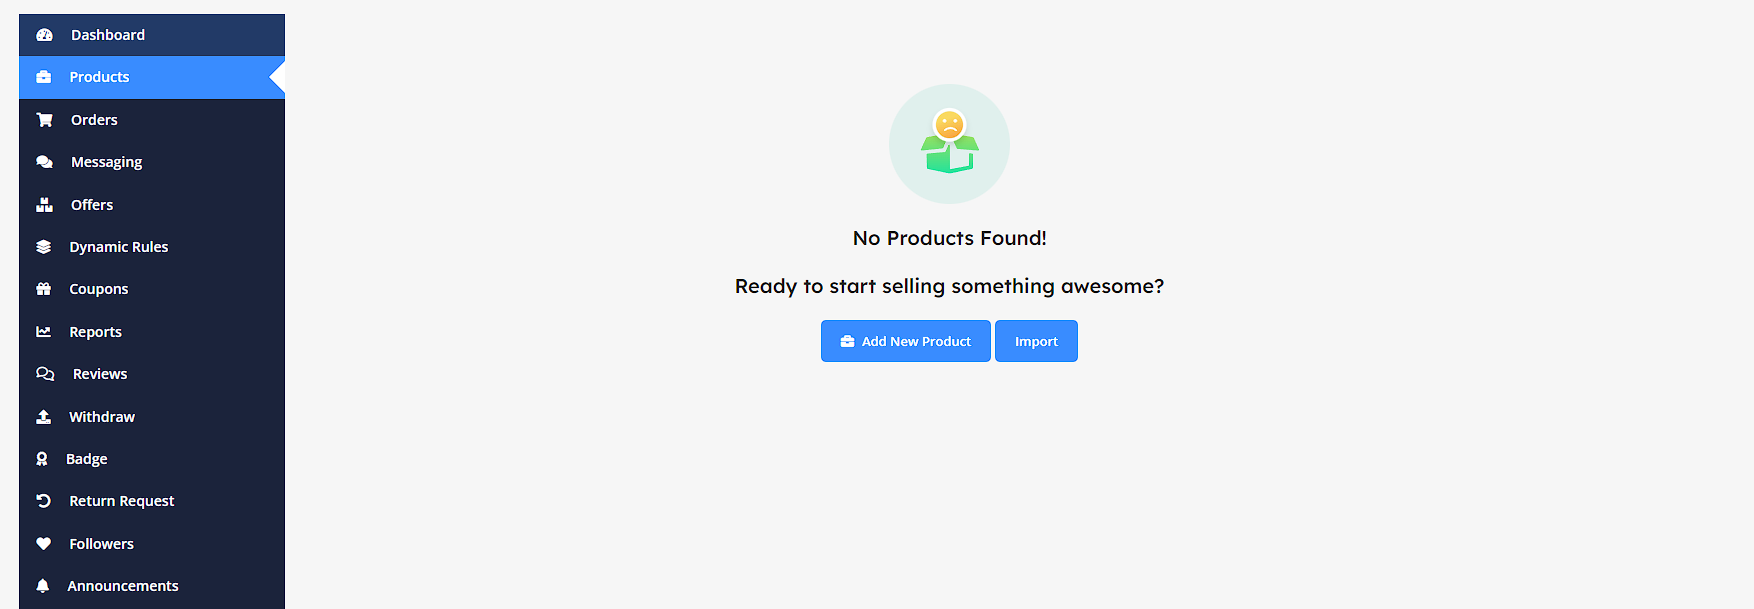
Blank Product Page
When Supplier setup their shop for the first time in the marketplace, they may not have any products. However, they can create their products from the Blank Product page.
They can create new products or import products as well. The import product option is available in the pro version.
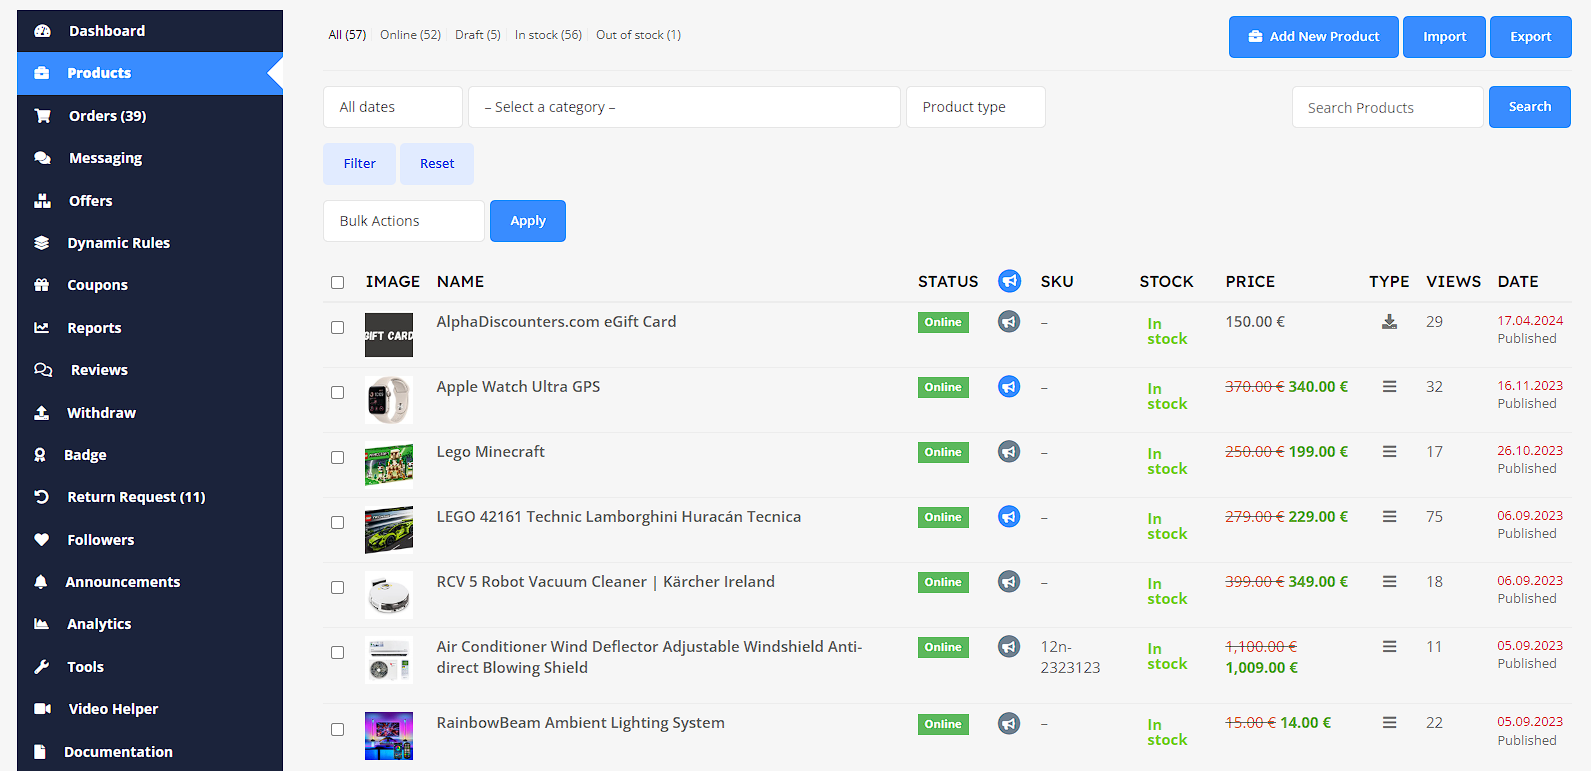
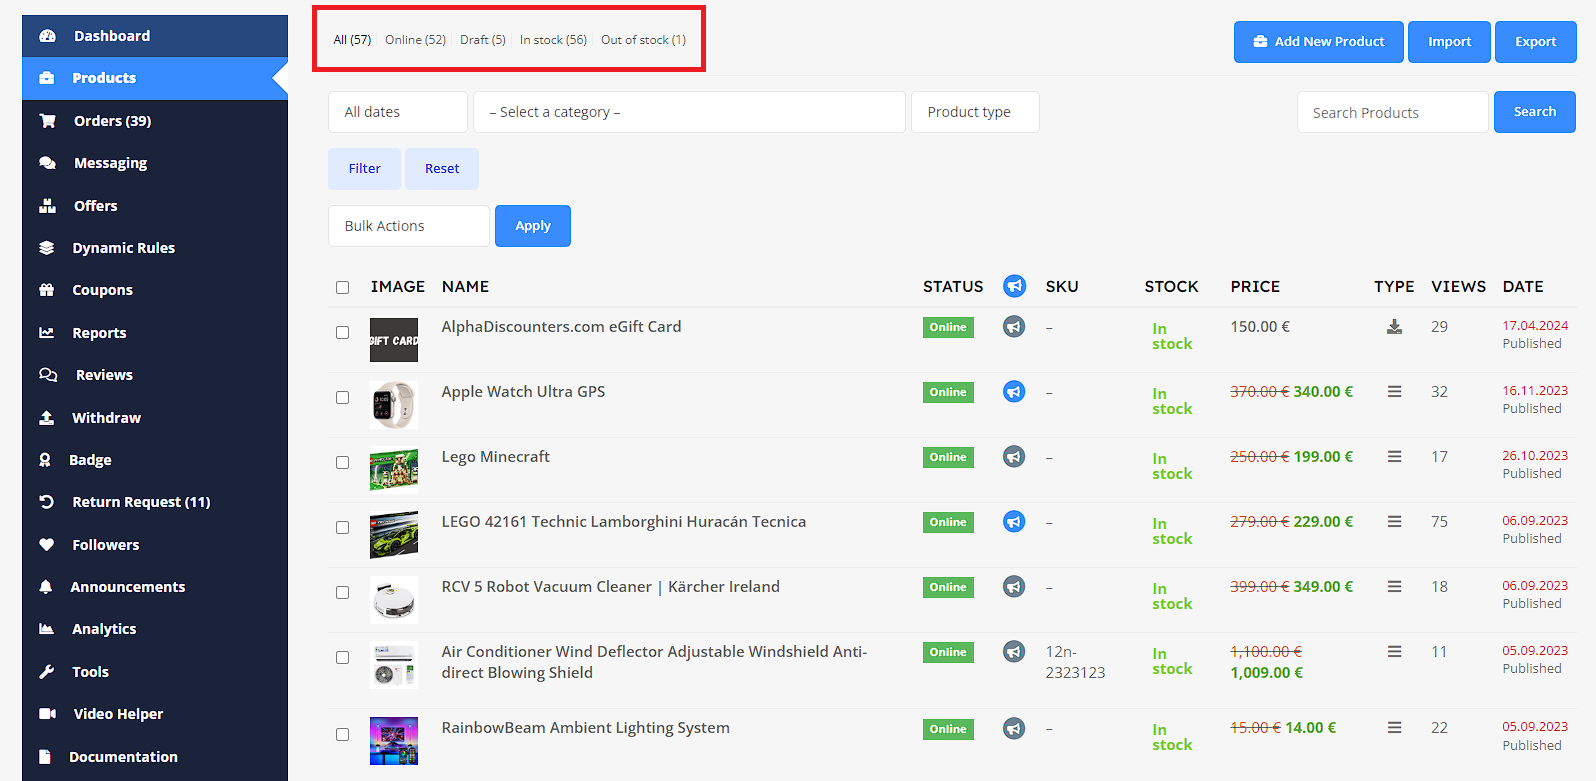
Filter Options for Product Listing Page
Now you can filter the products on your product listing page according to the product type. Just select the product type and click on Filter. You will see the filtered products on the list.
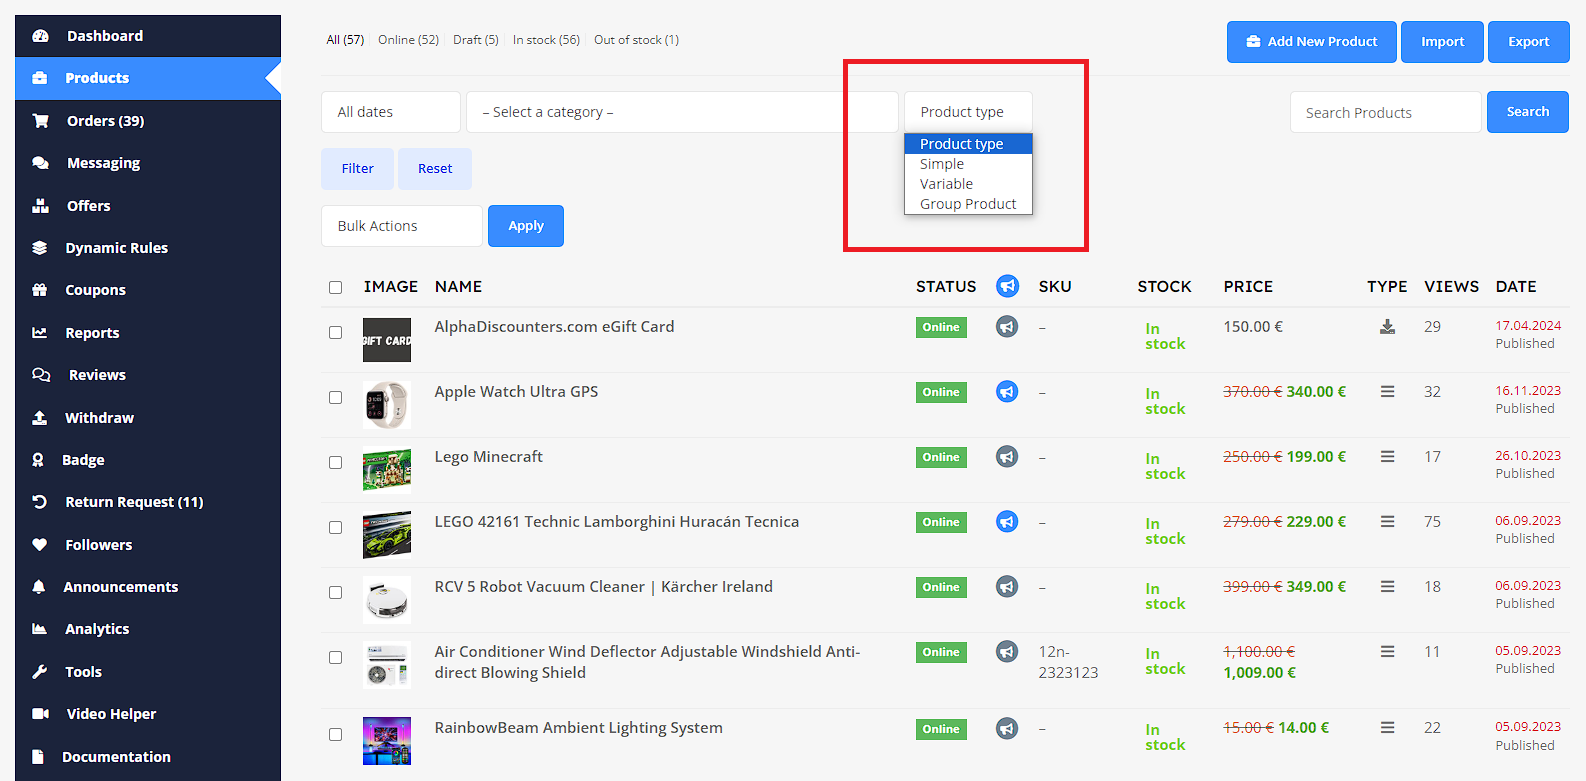
Also, you can filter the products based on their inventory.
Product Bulk Edit for Supplier
Just like the admin, Supplier can now edit the products in a bulk from the Supplier dashboard. Supplier need to go to Supplier Dashboard–> Products. There they need to choose multiple products to edit. Then click on the Apply button,
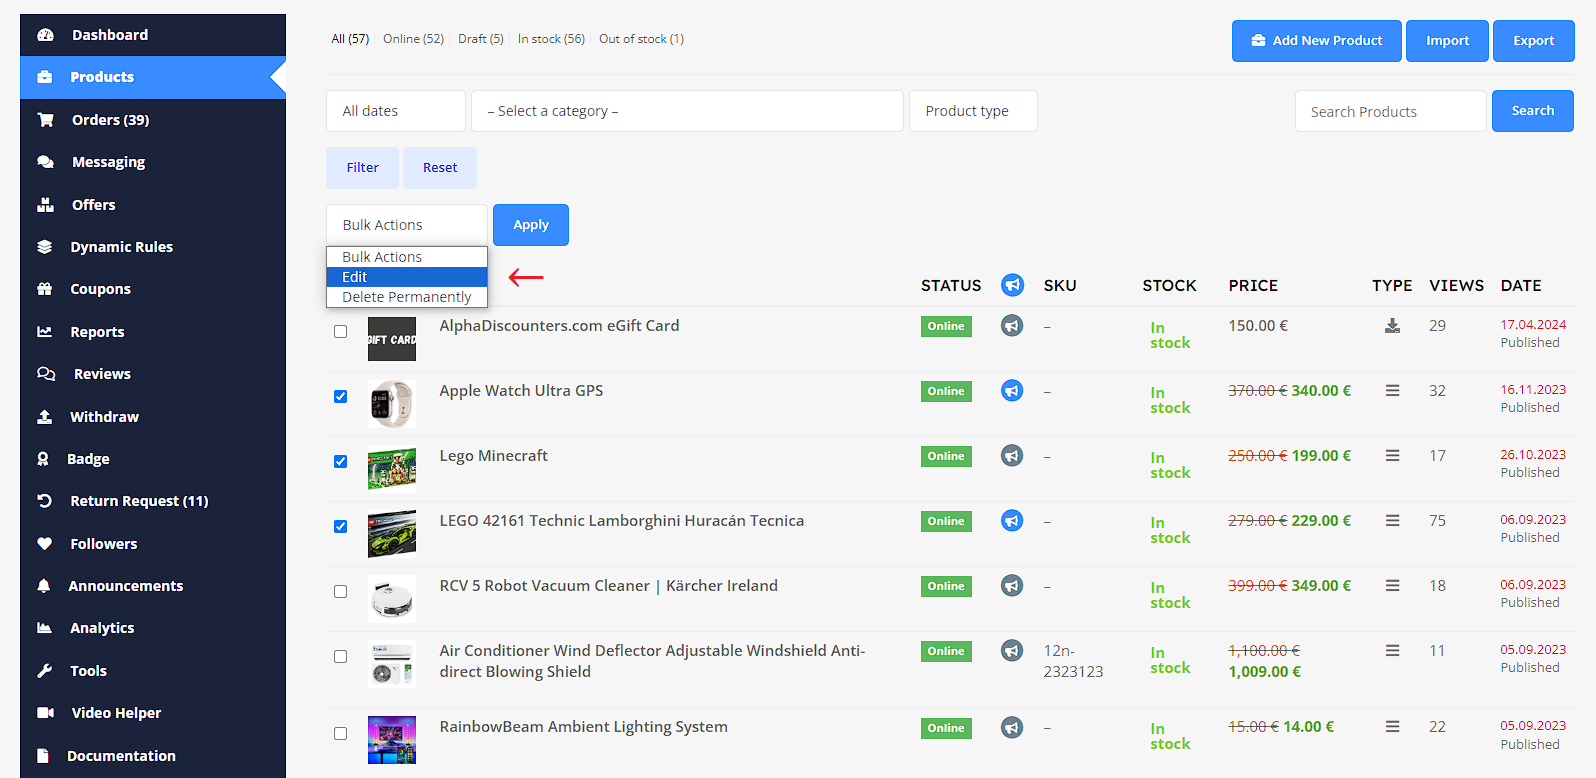
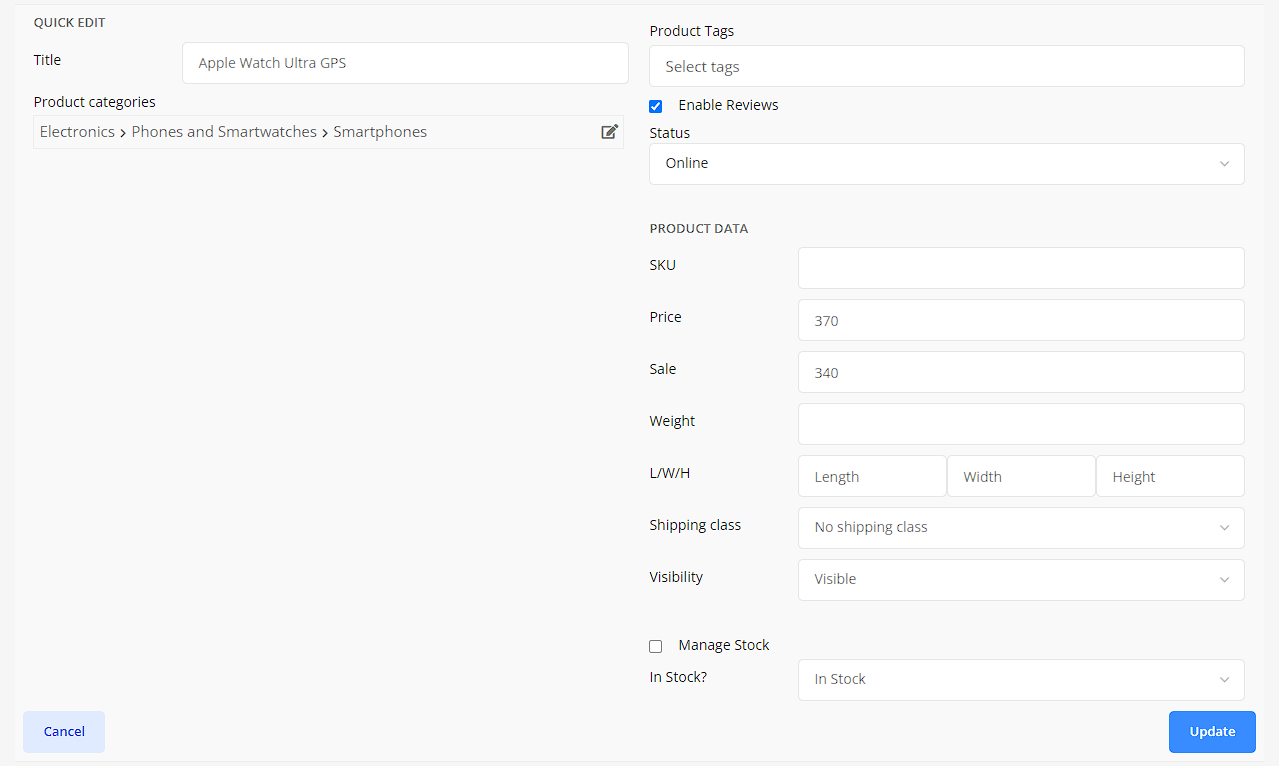
Now, Supplier can update/add product categories, change the product status to Draft, and new Tags. Also, they can update product price, sale, weight, shipping class, visibility, change stock status, etc. Click on the Update button to finish.
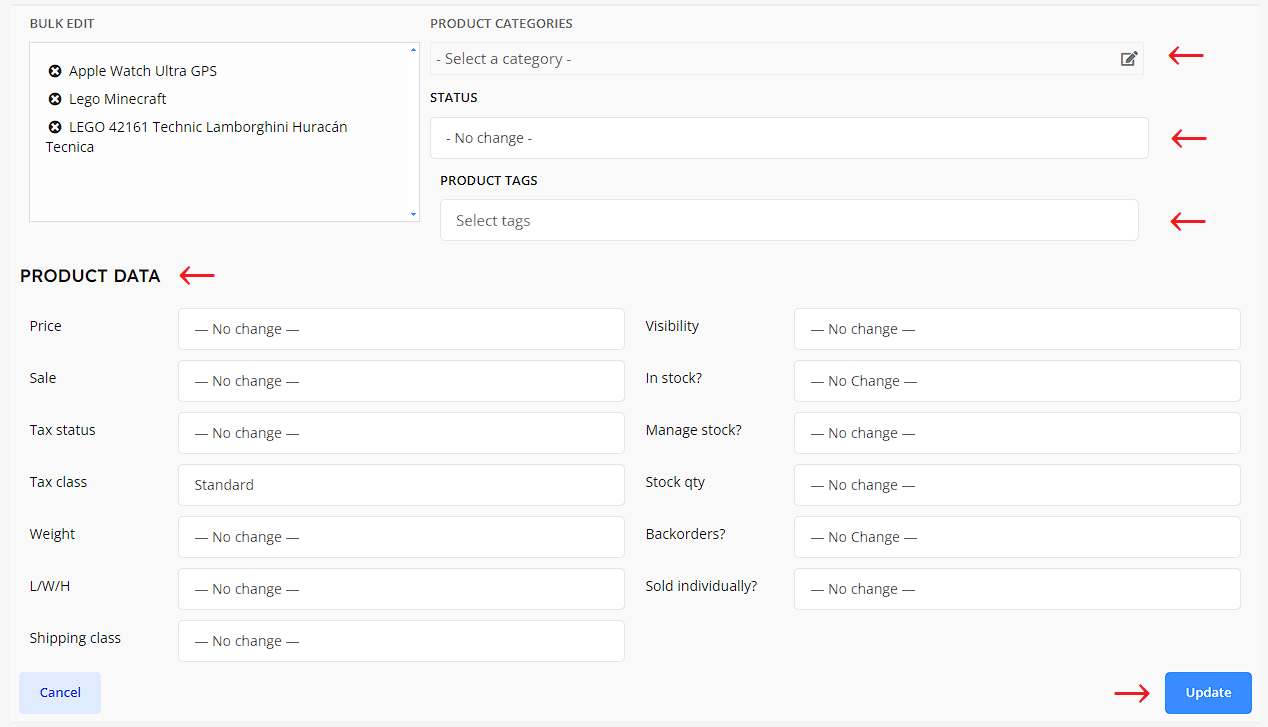
After finishing the update, Supplier will be able to see the changes in the Product list.
Quick Edit
If Supplier click on the quick edit option, they will be able to see the new categories and tags added.